Getting Started
An overview of the steps to get File Access Manager working.
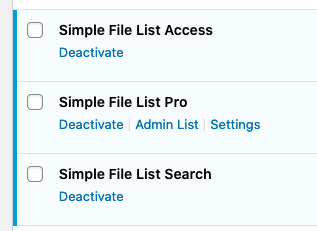
1) Activate the File Access Manager
Make sure the main Simple File List plugin is active, then activate the File Access Manager extension plugin. Go to the File List Pro settings menu.

2) Select the Mode
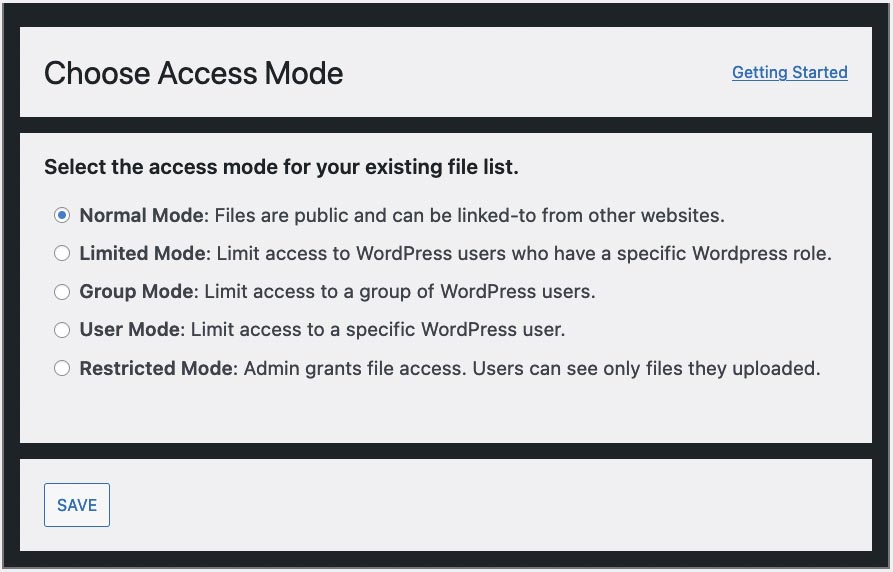
You will see this dialog asking you which type of mode you want to apply to your current list. Click here for a definition of the mode types.
For existing users, it is recommended to choose Normal Mode if you do not want any access restrictions added at this time. If there are external links directly to files in your list, then be sure to choose Normal Mode.
For new users, it is recommended to choose Restricted Mode. This ensures that your root files are protected. The Main File List can then act as the Administrator’s file list. Next, create additional file lists intended for the front-side of your website.
- Administrators, and users given permission, can freely move files and folders between file lists.
3) Save Your Choice
You will then see the File Operations Permissions inputs. For each operation choose from these permissions:
- Nobody – The feature is disabled.
- This User / This Group (For User and Group modes)
- Minimum Role – Only logged-in user with this role or above.
- Match role – Only for users with this specific role.
- Anybody – Everyone, including public users.
4) Define the Other Settings
Be sure to go through the each settings tab to ensure the list functions as needed. Remember, each list has its own unique settings.

- When File Access Manager is active, once you create a file list, the directory location cannot be changed. Create a new file list using the new directory location.
- Any new lists created will use the settings of the Main File List. If you need to create many similar lists, first set the Main File List’s settings as needed.
5) Get the Shortcode
To display the list on your website, you simply add the list ID to the shortcode:
[eeSFL list="1"]
This shortcode snippet is displayed at the upper right of the Admin Menu when viewing the file list. You can also get shortcodes using the List Manager or Shortcode Builder.
Omitting the list ID will display the Main File List
Use the settings tabs to define the list operation. If you need to place this list in an additional location, you can use Shortcode Attributes to over-ride the list settings.
6) Place the Shortcode
Place the shortcode snippet into any Page, Post or Widget. As Administrator, you should see all options available for all lists. Be sure to test the file list visibility and operations permissions using a separate login.
File List modes can be changed at any time using the settings tabs, as well as any other setting besides the directory path.
That’s all that is needed. Do you have questions?
Common Questions
Q: What happens if I deactivate the File Access Manager plugin?
A: Only the Main File List will appear. Shortcodes using additional list will show as blank.
Q: What happens if users click on an external link if my list is not set to Normal?
A: Currently, on common Apache servers* the user will see an Error 403 page, or Forbidden. If this is a problem, change the list mode to Normal. Create a new list for more private files.
* Windows and Nginx server users need to take extra measures to prevent direct-linking.

Hello!
I have a file list with match role, but users of that role still can’t access the files in that list. Error 97…
Error 97 = User Is Not Allowed To Do This
Please open a support ticket if you have not resolved this issue.
As of now, all failed attempts to one page, but redirecting to a different page for each one could also be useful.
Mainly I want it to redirect to a page showing a link to the login page for the user to login and see the file.
Thank you. Yes, there will be a method to allow the showing of alternate content of the users is not allowed access to the file list. This should be available around the end of the year.
File access is nice I’m sure but for me it’s hiding front end upload box entirely. I’ve set it to minimum role – contributor for everything and even I can’t see the box!
Hi. Here are a few things to look out for:
First, if you are using multiple shortcodes on a single page, the upload form and file management options will only appear for the first list. This is normal.
Next, Administrators should always be able to see all options when File Access Manager is enabled. If you don’t see the upload form, make sure you are not over-riding the upload visibility in the shortcode. Shortcode attributes should only be used to define the list, folder or to over-ride the main settings when the list is used in a secondary location.
Make sure you are looking at the correct settings for the correct list. If the shortcode defines list=”3″, make sure you are looking at that list in the settings. Refer to the List Title and/or shortcode snippet at the top right of the back-end list.
If the upload form will still not appear, look at the page source and see if the form code is there. Just do a find for “eeSFL_UploadForm” to jump to the code. If it’s there, check that something in your CSS is not hiding it. If the upload form is not in the code, enable debugging and see if any errors are produced.
Let me know what happens.
Is there a way for me to change the file access denied page to something other than a message saying ERROR 97: User Access Denied. You must be logged in to access this file, and instead to another page of my choosing?
There is not, but that sounds like a good feature to add. I’ll put that on the to-do list. Question: would you want to be able to redirect all failed attempts to just one page, or would you want to be able to redirect to a different page for each list?
Hi, is there anything new here yet? I’m interested in this too. If a user uses a copied link of a file and is not logged in, he should be redirected to a login page. Greetings
This is coming. SFL 7 will have many such improvements. Most of the work is done. I’ve just busy with client projects lately.